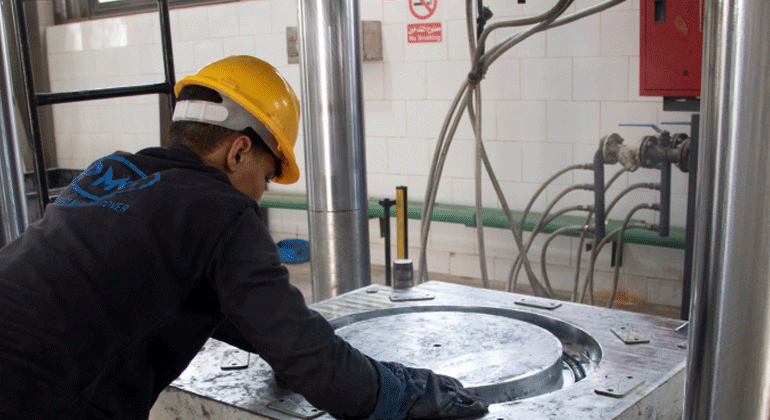
Composite Trench Cover
It’is mainly used in the inspection wells, cable trenches, drainage ditches and other areas of departments such as electric power, telecommunication and so on. Product size and load can be customized design and production according to different requirements.
Production Process
(1) Raw material preparation:
After receiving the production process card, first, check whether the stock raw materials used in this batch
of products meet the requirements (including filler moisture content, oil absorption value, resin viscosity,
etc., and a laboratory report is required), and then screen all the needed screened materials in advance, after
all raw materials meet the production requirements, strictly measure according to the process card, and
make the material name mark, and finally stack according to the batch. A small test or a pilot test must
be carried out before the formal batch production, If no problem can be transferred to batch production.
(2) Resin paste production:
2.1 Resin paste mixing:
2.1.1 Equipment preparation and start&stop procedures Adjust the mixing paddle, After installation of
cans, fix it with all safety devices (the positioning device should fall into the positioning hole on the ground) and start the disperser. After there is no abnormal sound, can turn the speed control button to idle once. After everything is normal, Can officially drive. At the end of mixing or due to the observation of mixing stop, be sure to speed down to 300 RPM max before the control panel can be stopped by the host.
2.1.2 Process control points
(1) adding resin and low-shrinkage agent to the 2000L tank to start stirring, Lasting 10-11 minutes.
(2) Adding initiator, inhibitor, color past, and styrene and stirring until uniform, lasting 3-5 minutes;
(3) adding mold release agent to stir evenly, increase the speed to the vortex, up and down the adjustment
several times, lasting 2-5 minutes;
(4) add Filler, until dispersed, lasting 10-20 minutes;
(5) in the above raw materials and mixed evenly, in advance with the next process,
after the next process is ready, start to add a thickening agent(MgO), in a very short time to make it evenly dispersed, and put it into the powder tank.
2.2 SMC Sheet production:
(1) Observe whether the total pressure gauge reaches 7.5 bar, if not quickly replenished;
(2) Observe whether all the fibers are put through the yarn feeding tube and reach the position of the cutting roller and whether the quantity stored is sufficient for this production. COTS air pressure according to the new and old degree in the range of 3-5 bar, pressure roller air pressure should be lower than cots.
(3) Be sure to tighten the impregnated tape before starting, otherwise, the machine will be damaged due to the SAG of the impregnated tape;
(4) check the position of the film and if the squeegee slot is suitable, if it is in the 20mm range, the screw the knob on the shaft side can be adjusted appropriately, if more than 20mm, the squeegee should be adjusted properly or the film should be removed for proper adjustment;
(5) press the pneumatic pedal valve of the moving material slot to check whether the
action is sensitive and whether the blade clearance is appropriate;
PMC PREFECT MANHOLE COVER 15
(6) check whether the swinging or coiling device is in normal operation.
(7) adjustment of press and impregnated tape: Check that the length of the impregnated tape is suitable, and the air pressure of the rear cylinder (feeding sheet) should be lower by about 6 bar (adjusted according to the length of the press). Too much air pressure will damage the machine and Mesh tape, the air pressure of the front cylinder can be adjusted according to the requirement of the glass fiber content, and a rectifying device is added in the press, which can adjust the stroke of the cylinder if the net belt continues to run off so that the net the belt is always in the middle position.
Notes two points:
1. After each production must clean up the equipment, otherwise active roll, immersion roll on the accumulation of the diameter of the materials so that the net with easy to damage the equipment and Net;
2. Check that the belt is in the correct position after the belt is tensioned (the edge of the belt is approximately in the center of the Nylon Rod).
(8) after the above conditions are normal, the machine can be run empty to check whether there are any abnormal conditions;
(9) after the main machine is normal, the next scraper will be put to one-third of the material, start the main machine and swing switch, so that the resin can run under the yarn cutting roller, start the yarn cutting motor, the resin continued to function to the appropriate location, stop the cutting motor, and then put the material into the glue trough, start the synchronous switch, start production. When the main engine stops
working, all start-up devices must be restored to the static state; the production end must clear the squeegee slot and the whole set of equipment.
(10) each batch of sheet production should be in place to cut about 0.5 kg of sheet mark, ready for inspection
Resin paste production and connection of equipment
1. Resin paste production and equipment connection
1. The resin, low shrinkage, initiator, mold release agent, and Filler are ready. Resin, low shrinkage were placed on the scale of 1200 * 1200, connected by pipeline in 3-inch PNEUMATIC DIAPHRAGM, diaphragm
pump outlet pipe connected to two 2000L mixing tank top 3-inch pneumatic ball valve; The initiator is poured into a 50L stainless steel tank and placed on a 700 * 700 scale. It is piped to a 1-inch electric diaphragm pump. The outlet end of the DIAPHRAGM PUMP is piped to a 1-inch pneumatic ball valve at the top of two 2000L mixing pipes. (small bag) powder material, Zinc stearate (mold release agent) weight on the side of the feeder ready to use.
2. Open the upper end of the tank with a pneumatic ball valve, start the resin pneumatic diaphragm pump according to the weight into the tank, start low-speed mixing, and continue to add low-shrinkage agent, initiator, and other liquid material starts high-speed mixing, lasting 5 minutes; Open the three-way Valve (through a tank),
open the feeder, add demoulding agent, pack and stir for about 20 minutes, after mixing evenly open At the bottom of the mixing tank, a 4-inch ball valve flows to the filter tank through a pump into the online mixer. Meanwhile, can B can be filled and stirred.
2. Online blending
1. Connect the pigment to the C pump and the C pump outlet to the online mixer in a 100 l tank.
2. The MAGNESIA is then poured into a 100 l mixing tank, the bottom of the tube is connected to the B pump, and the B pump outlet is connected to the online mixer.
3. A, B, C pump, on-line mixer start at the same time, material mixing uniform flow into the material tank.